Wednesday, December 31, 2008

Yorkshire Pudding

A Very Happy New Year!

I hope everyone has had a fabulous Christmas. Ours was quiet, but lovely, apart from a tornado warning (What the hell? This is December!) at 7am on Saturday morning. Our weather has been all over the place this past couple of weeks. Last week, Sunday – Tuesday, we had night time lows of 0°F and highs in the low 20’s. On Christmas Day we had a high of 62°F, and on Boxing Day 72°F.

(For more info on Boxing Day, check out my other blog: http://grandlakeink.blogspot.com )

Saturday a cold front moves in bringing storms and wild winds, but fortunately, the tornado passed us by. Then the past few days, temps have been back in the mid 60’s. Weird weather! Anyway, here endeth the weather report for NE Oklahoma.

Today’s recipe is Yorkshire Pudding. Don’t be misled by the title, this is not a dessert it's a batter pudding, like a pancake batter, but baked in the oven, and served with roasted meats and gravy. In England, Yorkshire Pudding is traditionally served with roast beef, but it makes a great accompaniment to any roast meat. I made these to have with our turkey on Christmas Day, and they are totally yumptious. Hubby is a Yorkshireman, and even he admits that for a Lancashire lass I make a mean Yorkshire Pud.

Yorkshire puds are also great served cold. I use them to make sandwiches, which hubby calls "pudding pots," with any leftover meat and stuffing. Or they can be served as a sweet with jam, preserves, or lemon curd.

If you’re interested, here is a little history of the dish.

Hannah Glasse is credited with creating the first Yorkshire pudding in 1745, and the original recipe appears in her book The Art of Cookery made Plain and Easy. Back then, meat was cooked on a spit over an open fire and a tray was placed under the meat to catch the drippings. Hannah Glasse hit on the idea of adding a pancake batter to the drippings and Yorkshire pudding was born.

Yorkshire pudding became very popular among the working classes who served it with gravy as an appetizer ― in reality a filler ― because meat was very expensive.

Yorkshire puddings traversed the Atlantic to the USA with the early pioneers and settlers. In this country they became known as Portland Popovers, individual muffin-sized puddings, and so named because the batter swells over the sides of the pan during cooking. The original Yorkshire pudding, however, was cooked in a large, shallow-sided baking dish and then cut into slices for serving.

Today, in England, you are more likely to find individual, muffin-sized Yorkshire puddings ― more akin to their American counterpart, popovers ― than their larger ancestor.

Yorkshire Puddings


Ingredients:

2 cups all-purpose flour.
1 pint milk.
2 eggs.
12 teaspoons vegetable oil.

Note: Most Yorkshire pudding recipes require half these ingredients, but I like my Yorkshire puddings to really "popover" during cooking.

Directions:
  • Preheat oven to 425°F.
  • Put flour in a large mixing bowl and make a well in the middle. Crack the eggs into the well and pour in half the milk. Mix with a wooden spoon until smooth.
  • Pour in remaining milk and beat with a fork, or whisk, until bubbles form on the surface. Place batter in refrigerator for 20 minutes.
  • In a 12 case non-stick muffin pan add a teaspoon of vegetable oil to each case, and place in the oven until the oil is smoking hot.
  • Meanwhile, remove batter from refrigerator and whisk again until bubbles form.
  • When oil is hot, quickly add batter to muffin cases, and return pan to the oven.
  • Bake for 25-30 minutes until golden brown. Do not open oven door during cooking as this will cause the puddings to go flat.

Tuesday, December 23, 2008

Happy Christmas Eve Eve


It’s Christmas Eve Eve. I hope you’re all ready for Santa, because if you’re not ready now, you’re not going to be. I, for one, have done all I’m gonna do, except cook Crimbo dinner. Here’s a festive joke recipe, I think it will give you a giggle.

HOLIDAY FRUITCAKE

With Christmas coming, here’s a fruitcake recipe that will help take the stress out of this normally stressful time.

Ingredients:

1 cup water
1 cup sugar
4 large eggs
2 cups dried fruit
1 tsp salt
1 cup brown sugar
3 oz lemon juice
1 cup nuts
1 gallon Absolut Vodka

Directions:

First sample the vodka to check for freshness. Take a large bowl. Check the vodka again to be sure it is of the highest quality.

Pour 1 level cup of the vodka and drink it. Repeat. Repeat again.

Turn on electric mixer; beat 1 cup of butter in a large fluffy bowl. Add water, eggs and 1 tsp sugar and beat again.

Make surr the vodka is still OK. Cry another tup.

Turn off mixers. Chuck in the cup of dried fruitt or something. Mix on the turner. If the fried druit gets stuck on the beaterers, pry it loose with a Drewsciver.

Sample the vodka to check for consistancity.

Next sniff two cups of salt. Or something. Who cares?

Check the vodka. Now sniff the lemon juice and strain your nuts. Add one table. Spoon. Of sugar or something. Whatever.

Grease the oven. Turn the cake tin 350 degrees. Don’t forget to beat off the turner. Whip the bowl out the window. Check the vodka again.

Go to bed. Who the hell likes *!#&*^$ fruitcake anyway.


Have a very Merry Christmas everyone. (hic)


Saturday, December 13, 2008

Cream of Mushroom Soup


Jo tagged everyone who reads her blog at http://lifeinwindermere.blogspot.com/ and as it’s nearly Crimbo, I thought I’d enter into the spirit and play along. Feel free to join in, if you wish.

1. Wrapping paper or gift bags? Wrapping paper. I’m one of those sick individuals who actually likes wrapping presents.

2. Real tree or Artificial? It has to be real, messy, but I love the smell.

3. When do you put up the tree? The weekend before Christmas.

4. When do you take the tree down? On the twelfth day of Crimbo.

5. Do you like eggnog? No, it’s too sweet.

6. Favourite gift received as a child? A doll’s house.

7. Hardest person to buy for? My dad.

8. Easiest person to buy for? Mick, he’s easily pleased.

9. Do you have a nativity scene? No.

10. Mail or email Christmas cards. Mail.

11. Worst Christmas gift you ever received? When I first moved to California, my mother-in-law always sent me tights (hose), in that ghastly shade of American tan. (Well, she was in her late 70’s then, bless her, and I suppose they were cheap to mail). The thing is, I hardly ever wore tights in California, and certainly not American tan.

12. Favourite Christmas Movie? The Great Escape. I know, I know, it’s not a Christmas movie, but they used to show it every year in England at Christmas, so I always associate it with the holiday.

13. When do you start shopping? Usually, end of October through November. I like to get everything sorted out before Thanksgiving. I can’t bear the madding crowds of Black Friday onwards. This year things didn't go according to plan. :-(

14. Have you ever recycled a Christmas present? I don’t think so, though I may have put some in the bin.

15. Favourite thing to eat at Christmas? Turkey with all the trimmings.

16. Lights on the tree? Of course, but not the flashing ones, I hate those.

17. Favourite Christmas song? There are a few, all ancient, but I like them anyway. Do they know it’s Christmas by Band Aid, Mistletoe and Wine by Cliff Richard, I Wish it Could be Christmas Everyday by Roy Wood, and White Christmas by Bing Crosby. For carols, I think Silent Night.

18, Travel at Christmas or stay home? Stay home. Christmas in England is always so much more fun than the US, but I hate travelling in winter, and I hate flying anytime.

19. Can you name all of Santa's reindeer's? No.

20. Angel on the tree top or a star? Neither, I don’t put anything on top of the tree.

21. Open the presents Christmas Eve or morning? Christmas morning.

22. Most annoying thing about this time of the year? The crowds, and the commercialism.

23. Favourite ornament, theme or color? A few miniature sweaters I knitted myself, which hang on the tree on mini hangers. For some reason, the cats take special delight in knocking these off the tree.

24. Favourite for Christmas dinner? Turkey and all the trimmings.

25. What do you want for Christmas this year? For a publisher to show some interest in my book.

Okay, enough of all that Christmas humbug, on with the recipe.

It’s been pretty cold around here this past week, with highs in the low 30’s F (approx. 1-2°C). Monday they are forecasting snow, with a high of 27°F (minus 3°C), and a low of 15°F (minus 9°C). Brrrrrrr. Soup is definitely the order of the day.

I have been making this cream of mushroom soup for so long that I have no idea where the original recipe came from. The original does use a full stick of butter, and a cup of cream, I use slightly less butter, and half the cream, and it is still creamy and delish. Served with lots of crusty bread, it’s a meal in itself.

Cream of Mushroom Soup


Ingredients:

1 lb. mushrooms
6 tablespoons butter
1 small onion, fairly finely chopped
1/3 cup all-purpose flour
3 cups chicken broth
Black pepper, to taste
½ cup heavy whipping cream

Directions:
  • Remove stems from mushrooms. Slice mushroom caps, and chop stems.
  • Melt butter in a large saucepan or Dutch oven over a medium heat.
  • Add sliced mushroom caps to pan, and sauté until mushrooms are tender, approx. 5 minutes.
  • Using a slotted spoon, transfer mushroom slices to a plate and set aside.
  • Add onion and mushroom stems to same pan and sauté until onion is translucent.
  • Stir in flour and ½ cup of broth until flour is blended. Gradually add remaining stock, stirring constantly until thickened.
  • Transfer onion/mushroom mixture to a blender and puree.
  • Return pureed mix to pan, add mushroom caps, season with a little black pepper, and reheat for 5 minutes.
  • Add cream, and heat gently for a further 5 minutes, do not allow to bubble.


Monday, December 8, 2008

Kohlrabi and Chicken and Vegetable Bake


This strange looking vegetable, which bears a striking resemblance to a sputnik, and looks like something that might have landed from outer-space, is a kohlrabi. I first read about kohlrabi on David Hall’s blog at: http://bookthecook.blogspot.com/ and wanted to give it a try. Of course, it isn’t available in our sleepy backwater, so hubby grew some from seed, and planted it this fall as it doesn’t like our hot summer temps.


Kohlrabi proved to be a huge success, particularly as the Oklahoma bugs left it alone and devoured all our cabbages and Brussels sprouts instead. This fall and winter I have used this veggie in all sorts of soups, stews, and casseroles. It has the flavor of a cabbage heart, but is milder and sweeter, it also has undertones of turnip and celery, and the texture of a rutabaga or swede. In fact the name kohlrabi is German and means cabbage/turnip.

Today’s recipe is based very loosely on one in the BBC Good Food magazine, as I changed the type of chicken, most of the veggies, and the herbs.

Chicken and Vegetable Bake


Ingredients:

2 tablespoons olive oil
1/2 cup flour, seasoned with black pepper
6 chicken thighs, trimmed of excess skin and fat
2 lbs. red potatoes, cut into ¼ inch slices
1 bulb of garlic, separated into cloves, topped and tailed but unpeeled
½ a kohlrabi, peeled and cut into bite sized chunks
1 red pepper cut into chunks
2 teaspoons dried rosemary
1 beefsteak tomato cut into wedges
1 orange cut into segments

Directions:
  • Pre-heat oven to 400°F
  • Coat chicken thighs with seasoned flour.
  • Heat 1 tbsp. oil in a large skillet over a medium high heat, and fry chicken until crisp and golden brown on both sides, approx.8 -10 minutes.
  • Heat remaining oil in a roasting pan. Transfer chicken to roasting pan, along with potatoes, garlic, kohlrabi, peppers, and rosemary. Roast for about 20 minutes, until potatoes start to soften.
  • Add tomatoes and orange segments and roast for a further 5-10 minutes, until chicken and potatoes are thoroughly cooked.
  • To serve, bring the roasting pan to the table and let everyone help themselves.

Thursday, November 27, 2008

Happy Thanksgiving!

I know all you cooking bloggers out there will have had a busy old time today, but I hope it’s been a happy one, and that you are now stuffed with turkey and snoozing on the sofa.

I am often asked what we do in England at Thanksgiving. My answer is always the same – nothing, because we have bugger all to be thankful for in England. Only joking folks. :-) Personally, I think I won the lottery of life being born British. But, Thanksgiving is all about Pilgrims in a new land, many of whom were escaping what they perceived as religious persecution/intolerance in Britain, and the festival, therefore, has no place in British culture.

Anyway, I have a few reasons to be thankful right now. My right arm is finally mending. Most of the bite marks healed up after about a week, but there was one that just would not heal. It was so bad that I feared Alvin had done lasting damage. Yet, after a month of ministrations from nurse Mick, I now have full use of my arm again. Also, the insurance company are going to cough up the money to repair our car. Hooray!

I also have lots of other reasons to be thankful. I have a wonderful hubby, three fine boys (my cats), a great family, and many good friends. And last, but most definitely not least, thanks to you folks who take the time and trouble to come and read my blog, I appreciate it more than you will ever know.

It being Thanksgiving, I actually donned my baker’s hat. I know!!!!! Stands back in amazement, Jan has actually baked a cake. These cranberry walnut bars are a firm favorite in our house, and get wheeled out every Thanksgiving and Christmas. Our neighbors get these every year for their Christmas box. One year I tried giving them something different, and they all wanted to know what happened to the cranberry and walnut bars. Oh hum!

The original recipe came from a lady I knew in California. On this occasion, I made two cakes and Mick took one to work. His co-workers loved them, and he said he could get me a few commissions if I was interested. I don’t think so. After all, I am the reluctant
cook. ;-)

On a little side note. I know a few of you have expressed an interest in the Zen Spoonmaster’s cooking utensils, but it seems they have now disappeared from their web site. When I checked it out, I noticed that they have updated the site, and I have e-mailed Jan Meng to find out what’s happened to the spoons. I’m sure it’s just a temporary glitch, and I’ll get back to you about it as soon as I hear.

Meanwhile, on with the show.

Cranberry and Walnut Bars


Ingredients:

2 eggs
1 cup sugar
1 cup all-purpose flour
1/3 cup butter, melted
1¼ cups fresh cranberries
½ cup chopped walnuts

Directions:
  • Pre-heat oven to 350°F.
  • Grease an 8-inch square baking pan with a little butter.
  • In a large mixing bowl, beat eggs until thickened.
  • Gradually add sugar, beating until blended.
  • Stir in flour and melted butter.
  • Add cranberries and walnuts, mixing gently until combined.
  • Spread evenly in pan, and bake for 40-45 minutes, until golden brown and a toothpick inserted in the center comes out clean.
  • Cool and cut into bars.


Sunday, November 23, 2008

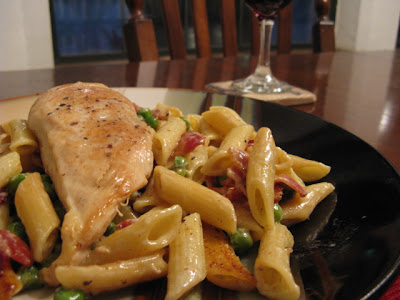
Chicken with Creamy Bacon Penne, and an “Oh Deer” moment

It’s true what they say, it doesn’t rain but it pours. Not only am I still having problems with my arm, but last week, Mick hit a deer on his way to work. He was driving on a two-lane highway, with a 55-MPH speed limit, when the deer ran right out in front of him and stopped. He had no chance to brake, or swerve to avoid it. The deer went right across the bonnet (hood).

The result:
Damage to Mick – zero
Damage to car – bad, but repairable
Damage to deer – terminal.

At first glance, the car doesn’t look too bad, but one headlight is smashed, the bonnet (hood) is dented and warped, and the side panel is cracked and hanging loose. But at least Mick was only shaken, not stirred, and that’s the main thing. Still, one cannot help but wonder, what else is going to go wrong?

On a brighter note, my latest article for Oklahoma Living Magazine can be found here:

http://www.ok-living.coop/Feature_3.php

The article is about a recent visit to a local arts center called, Hungry Holler, home of renowned artists, Jan and Marc Meng. Jan is a self confessed gourdphile, who creates beautiful works of art from homegrown gourds. The article shows some of her work on exhibit in their small rustic gallery. If you’d like to see more, check out their web site at: http://www.hungryholler.com/

Marc is known as the Zen Spoonmaster as he lovingly handcrafts cooking utensils from woods such as maple, wild cherry and walnut. Each spoon he creates is totally unique and will last a lifetime. Also the spatulas are made for right and left handed cooks.


I have begun my own collection as you can see below, and will be adding to it on my next visit. Why not treat yourselves this Christmas? You’ll be glad you did, these spoons are a pleasure to work with.


Anyway, without further ado, on with the recipe.

This is another recipe from the BBC Good Food magazine, so kindly sent to me by Beth at: http://jamandclottedcream.blogspot.com/

I did make a few alterations to the recipe, the main one being I didn’t cook the bacon with the chicken. American bacon is of poor quality compared to British bacon, and cooking the two together would have resulted in a lot of bacon grease. Also the quantities of wine and cream seemed a bit stingy, so I increased those. The result was fabulous. Mick absolutely loved this dish, and pronounced it a definite keeper.

Chicken with Creamy Bacon Penne


Serves 2

Ingredients:

5 slices thick bacon, chopped into 1-inch pieces
1 tablespoon olive oil, and a little drizzle
2 skinless, boneless chicken breasts
1/3 cup dry white wine
1 cup frozen peas
1/2 cup heavy cream
8-ounces penne pasta
Black pepper, to taste

Directions:
  • Boil pasta for 5 minutes, drain into a colander, drizzle with a little olive oil to prevent it sticking together.
  • In a large skillet, over a medium high heat, cook bacon until crisp. Remove bacon from pan, and set aside on paper towels to drain. Drain bacon grease from pan, but don’t wipe or clean pan.
  • In same skillet, heat olive oil over a medium heat, and cook chicken for about 5 minutes each side.
  • Pour in wine and allow to bubble until half the wine has evaporated.
  • Add peas, cream, penne, and bacon to skillet, and season well with fresh ground black pepper. Do not add salt as the bacon already creates a salty taste.
  • Cover pan and cook for a further 5 minutes, until chicken is thoroughly cooked and all other ingredients are heated.

Serve immediately. Yum!


Sunday, November 16, 2008

Pickled Red Cabbage

This summer, one of Mick’s co-workers gave us a couple of lovely homegrown red cabbages. As it is traditional to serve pickled red cabbage with Lancashire Hotpot, I decided to try my hand at pickling, something I have never done before. So, although I made this back in July, last week was the first time it was sampled, and it made an excellent accompaniment to the Hotpot.

The recipe for pickled red cabbage came from Isabella Beeton’s 1861 cookbook entitled, Book of Household Management. The following information about Mrs. Beeton comes from Wikipedia.

"Isabella Mary Beeton (nee Mayson; 12 March 1836 – 6 February 1865), universally known as Mrs Beeton, was the English author of, Mrs Beeton's Book of Household Management, and is one of the most famous cookery writers in history.

Popularly known as Mrs Beeton's Book of Household Management, it was essentially a guide to running a Victorian household, with advice on fashion, childcare, animal husbandry, poisons, the management of servants, science, religion, and industrialism.

Of the 1,112 pages, over 900 contained recipes, such that another popular name for the volume is Mrs Beeton's Cookbook. Most of the recipes were illustrated with coloured engravings, and it was the first book to show recipes in a format that is still used today. It is said that many of the recipes were actually plagiarised from earlier writers (including Eliza Acton), but the Beetons never claimed that the book's contents were original. It was intended as a guide of reliable information for the aspirant middle classes. Mrs Beeton is perhaps described better as its compiler and editor than as its author, many of the passages clearly being not her own words."

Below is her recipe for Pickled Red Cabbage.


Ingredients

red cabbage
salt
water
2 pint vinegar - to each quart add 1 tbsp ginger, well bruised
1oz whole black pepper
a little cayene, if liked

Method

1. Take off the outside decayed leaves of a nice red cabbage, cut it into quarters, remove the stalks, and cut it across in very thin slices.
2. Lay these on a dish, and cover them plentifully with salt, then cover with another dish.

3. Leave for 24 hours; turn into a colander to drain, and if necessary, wipe lightly with a clean, soft cloth. Put them in a jar; boil up the vinegar with the spices, and when cold, pour it over the cabbage.

It will be fit for use in a week or two, but if kept for a very long time, the cabbage is liable to get soft and discoloured. To be really nice and crisp, and of a good red colour, it should be eaten almost immediately after it is made. A little bruised cochineal boiled with the vinegar adds greatly to the appearance of this pickle. Tie down with bladder, and keep in a dry place.

The only changes I made were:

I used some salt, but not plentiful amounts.
I used ground ginger instead of fresh.
I didn’t use cochineal.
I used a screw top lid on the jar, not a bladder.

And, despite having been made three months earlier, it was still crisp, and a good red color.


Sunday, November 9, 2008

I'm Back! (Kind of)

Well, I’ve had better weeks. Not only did I have problems with my arm from the cat bite, but last weekend, the bottom half of my face swelled up until I looked like a hamster who’d had lip enhancements. Needless to say, I went back to the doctor who told me I’d had an allergic reaction to the antibiotics, so she put me on a different one. My arm has since slowly improved, but is still not completely healed. One of Alvin’s teeth went particularly deep, and I think it may have damaged a tendon or something. This area is still very red and swollen, and pretty sore. I think if it doesn’t improve in the next day or so I will have to go back to the doctor.

Anyway, Mick, le petit chef, did a great job in the kitchen for those few days I had to keep my forearm elevated, and has since been invaluable for chopping, stirring and the like. It’s quite frustrating not being able to do things myself, but I am adapting to my supervisory role. :-) And thanks to all of you for commiserating with my misfortune, I have really appreciated all your good wishes.

Also, I must thank Nicole at: http://www.testkitchenrecipes.blogspot.com/ for giving me this award.
I'm sorry it's taken so long for me to acknowledge it, I'll be passing it along next time. Thank you Nicole.

Today’s recipe is Lancashire Hotpot, a traditional dish from my home county in England. The origins of Hotpot are a little vague. Some claim it has its basis in the Lancashire cotton industry, as it is a simple dish to prepare and has a long cooking time. Women mill workers could prepare it in the morning, leave it to cook all day, and it would be ready when the family came home from work. Others say it originated with the miners, who would take the pot to work wrapped in a blanket, where it would keep warm until lunchtime. Still others suggest it was prepared for shepherds to eat while tending their sheep on the moors.

But, one thing historians generally agree on is that Lancashire Hotpot made its first appearance during the industrial revolution of the mid 19th century. Hotpot is certainly mentioned in Elizabeth Gaskell’s novel, North and South, which was first published in 1855. Mr. Thornton, a mill owner in the novel says of Lancashire Hotpot, "I never made a better dinner in my life." I hope you all enjoy it as much.

Originally, Hotpot was made with mutton and oysters, both of which were very cheap in 19th century England; nowadays we use lamb and exclude the oysters. I’m afraid I have deviated even more from tradition and used beef. I did actually manage to get some lamb – but that’s a whole other story – and we have now become so accustomed to the beef version that we actually prefer it. I guess you could say that my Lancashire Hotpot is a variation on beef stew, but what ever it is, it’s darned tasty.


Lancashire Hotpot

Ingredients:

1lbs beef stew meat
½ cup seasoned flour
1 tablespoon olive oil
2lbs russet potatoes, thinly sliced
1-cup beef broth/stock
1 onion sliced
3 carrots, sliced
1 turnip or rutabaga, sliced
4 tablespoons melted butter, divided

Directions:


  • Pre-heat oven to 375°F.

  • Put flour and beef in a resealable plastic bag, and shake to coat.

  • Heat oil in a large skillet over a medium high heat, add beef and sauté until browned.

  • Transfer the meat to a tall-sided casserole or Pyrex dish and top with a layer of potatoes. Use the smaller pieces, reserving the larger ones for the top layer.

  • In alternate layers add, onions, rutabaga, carrots, and top with remaining potatoes.

  • Pour in the stock.
    Brush the potatoes with half the melted butter. Cover dish and bake for 1½ hours.

  • Remove the dish from the oven, and brush the potatoes with remaining melted butter.

  • Return dish to the oven, and cook uncovered for a further 30 minutes or until potatoes are browned. If the potatoes don’t brown evenly pop the dish under the broiler for a few minutes.


Friday, October 31, 2008

Damn Cats!

I’m sorry I haven’t been around much lately, and this is going to be the case for a while longer. On Monday and Tuesday, I wasn’t feeling very well. Then on Wednesday, my cat Alvin was ill, so I took him to see the vet. Unfortunately, while the vet took Alvin’s temperature, I held his head. I thought I had a firm grip on him, but he managed to get loose and sunk all his teeth into my arm.

As it was a very nasty bite, I went to the doctor for a tetanus shot. She also gave me antibiotics and painkillers, as she was particularly concerned that Alvin might have passed his infection onto me. She also told me to keep my forearm elevated for 2-3 days, so I’m not supposed to be typing, but I just wanted to let you know what was happening.

My right arm is red and swollen from the wrist to the elbow, and is extremely painful. It was so bad that I couldn’t get the childproof caps off the antibiotics and painkillers, and had to wait for Mick to get home from work before I could take any. :-) But the good news is, Alvin is recovering from his infection, so hopefully, normal service will be resumed with me very soon.

Thursday, October 23, 2008

Leek, Bacon, and Potato Soup

Wouldn’t you know it? I no sooner get through gloating about how wonderful our weather is when a cold front moves in. Yesterday, we had thunderstorms and torrential rain all day. Our temperatures plummeted 30 degrees in just a couple of hours, and went even lower overnight. There could be no better time for some soup.

This is one of my favorite soups. Leek and potato soup has been around for yonks (years) in the UK, but the addition of bacon and some cheddar cheese gives it an extra dimension.

I don’t know if it’s the same where you live, but leeks don’t seem to be very popular in Oklahoma. Whenever I buy them, the cashiers at the store always have to ask me what they are. So if you’ve never tried them, give them a whirl, they add a wonderful flavor to all manner of soups and stews.

Leeks are a member of the onion family, and in fact, look much like very large spring (green) onions, but their taste is quite different to onions.

Just to digress a moment. Last winter, I made this soup for my husband to take to a pot luck at work. No one got to try it though. On his way to work, with the crock-pot on the floor of the car, someone pulled right out in front of him, and Mick had to jam on the anchors. Result – soup all over the bloody car. Oh, hum.

Anyway, without further ado, on with the recipe.

Leek, Bacon and Potato Soup


Just a word of advice about leeks before we begin. Leeks can have a bit of a gritty texture, but if you prepare them this way that won’t happen. Top and tail your leeks - just use the white and pale green flesh - then slice them down the middle length ways, but don't cut them right in half, then rinse them under running water for a minute or two and they'll be great.

Serves 4

Ingredients:

6 slices thick bacon, cut into 1-inch pieces
1 onion, chopped
2 carrots sliced
2 leeks chopped
4 large russet potatoes, chopped into bite size pieces
1 tablespoon olive oil
4 cups chicken broth
A dash of cayenne pepper (approx.1/8 teaspoon)
1 cup of sharp cheddar, shredded

Don't add salt to this recipe as the bacon tends to make the soup salty enough.
  • In a large saucepan, or Dutch oven, fry bacon in its own grease until crisp. Remove bacon from pan, drain on paper towels, and set aside. Discard bacon grease and wipe pan thoroughly with paper towels.
  • Add olive oil to pan, and over a medium heat sauté onion for 2 – 3 minutes, add carrots and leeks and sauté for a further minute, or until onion is soft but not brown.
  • Stir in chicken broth, potatoes and cayenne pepper, bring to boil, reduce heat, and simmer covered for about 30 minutes.
  • Return bacon to pan, and reheat for about 5 minutes.
  • Reserve a little of the cheese to sprinkle on top of each bowl, and add the rest to the pan, stir until cheese has melted, do not allow to boil.

Served with crusty bread this soup is a meal in itself.

Monday, October 20, 2008

Cheesy Potatoes on the Grill

It was a beautiful weekend here in my little corner of northeast Oklahoma, lots of sunshine, clear blue skies, and temps a balmy 75°F. Just perfect for dragging out the BBQ for what will probably be the last time this year.

This is not terribly exciting, it's only a spud recipe, but they are pretty darned good. The cheesy potatoes, were cooked on the grill alongside some chicken on the ribs. We also have some rainbow chard growing in our garden at the moment, so I sautéed some in butter and garlic.

Cheesy Potatoes on the Grill (or in the oven if you prefer)


Ingredients:

3 large russet potatoes, thinly sliced about 1/8 inch
1 small onion, thinly sliced
½ cup mozzarella, shredded
¼ cup sharp cheddar, shredded
Black pepper, to taste
2/3 cup milk, warmed
1 tablespoon butter, melted
2 tablespoons Parmesan cheese, shredded

Directions:
  • Pre-heat grill to low, or oven to 425°F
  • Grease an 8 x 8-inch foil tray (or baking dish) with butter.
  • Arrange smaller potato pieces in layers in bottom of dish, top with a layer of onions, then a layer of cheese, and add pepper to taste. Layer larger sized potatoes on top. Pour in the warm milk, brush top with melted butter, and sprinkle over the Parmesan.
  • Bake on grill for about 50 minutes, then put the foil pan under a hot broiler for 2 –3 minutes to brown the surface.
  • Or bake in the oven for 45-50 minutes. These potatoes usually brown okay in the oven without recourse to the broiler, but if they don’t you know what to do.

Tuesday, October 14, 2008

Quiche Lorraine Plus

Who was it that said, real men don’t eat quiche? To tell the truth, I have no idea, but they obviously didn’t know my husband. He would eat minced tires as long as there was a crust involved.

Also, I’m sure I’ve told you before, but me and pastry don’t mix. I just can’t make it. And when I do, I can’t get it off the board and into the dish without it falling to bits. Well, we can’t all be perfect, and I know my limitations, so I just buy those ready made pastry sheets now.

This is a bit of a variation on the traditional Quiche Lorraine, (which incidentally, was called bacon and egg pie when I was a kid), as I’ve added bell peppers and mushrooms, some mustard, and some chives.

Quiche Lorraine Plus


Ingredients:

6 slices of thick bacon, cut into 1-inch pieces
1 tablespoon olive oil
½ red pepper, chopped
½ green pepper, chopped
1 small onion, chopped
4 ounces mushrooms, sliced
6 eggs
2/3 cup milk
1 cup sharp cheddar cheese
1 teaspoon ground mustard powder
1 tablespoon fresh chives, chopped
Fresh ground black pepper to taste
1 refrigerated Pillsbury dough piecrust, brought to room temperature

Directions:
  • Fry bacon in a large skillet over a medium high heat until crispy. Remove bacon from pan and drain on paper towels. Discard bacon grease and wipe pan with paper towels.
  • In same skillet, heat olive oil over a medium heat, add peppers and onions to pan and sauté until onion is translucent. Remove veggies from pan and drain on paper towels.
  • Allow bacon and veggies to cool for a few minutes. Meanwhile, pre-heat oven to 375°F, unroll pastry from package, and roll slightly with a rolling pin. Place crust in pie dish, and trim any excess pastry from edges of the dish.
  • In a large bowl whisk eggs and milk together, stir in mustard, chives and black pepper.
  • Add a layer of bacon to pie crust, then a layer of onions and peppers, then a layer of sliced mushrooms. Top with cheese, pour over egg mixture, and bake for 35 – 45 minutes.
  • Allow quiche to cool for 10 minutes before serving.


Friday, October 10, 2008

Chicken and Bacon Casserole with Dumplings

This recipe has been a favorite winter warmer in our house for several years. Earlier this week it was cool and rainy, which gave me the perfect opportunity to make this casserole. Good thing I did as the cool weather didn't last long, it’s now back to sunny and 83°F.

The original recipe came from a packet of Atora (English) suet, but it has been tweaked quite a bit over the years. Please don’t let the mention of suet put you off, this is nothing like the stuff you Americans feed the birds. That said, beef suet is contraband over here, but a good friend sent me a couple of packets after his last trip to England, so I got to use some of my stash for the dumplings.

Now if you’re feeling adventurous you can get Atora vegetable suet on-line, it’s a good substitute, and you can find it here:

http://www.britishdelights.com/detail.asp?PRODUCT_ID=D22

Alternatively, you’ll find a recipe for suetless dumplings at David Hall’s blog, Book the Cook, which you’ll find here:

http://bookthecook.blogspot.com/2008/04/legless.html

Or just use whatever dumpling recipe you would normally use, but if you’ve never tried suet dumplings you are missing a real treat. Suet can also be used as shortening and makes great tasting pastry.

Chicken and Bacon Casserole with Dumplings

Sorry about the photo, this is straight out of the oven so the picture doesn’t really do it justice. But trust me, this is a great tasting casserole.


Ingredients:

6 slices thick bacon, chopped into 1-inch chunks
1 tablespoon olive oil
2 skinless, boneless chicken breasts, fairly thickly sliced.
1 onion, sliced
1 green pepper, cut into chunks
3 cloves of garlic, finely chopped
2 tablespoons flour
2 cups chicken broth/stock
Fresh ground black pepper, to taste
2 bay leaves
12 button mushrooms
1 beefsteak tomato, cut into wedges

Dumplings:

½ cup self-raising flour
¼ cup Atora suet
Cold water to mix, approximately 4-6 tablespoons

Directions:
  • Pre-heat oven to 350°F
  • In a large saucepan (use a Dutch oven if you have one) fry bacon over a medium high heat until crispy. Remove from pan and drain on paper towels. Discard bacon grease and wipe pan with paper towels.
  • In the same pan, heat olive oil over a medium heat, add chicken and cook until no longer pink, about 3-4 minutes. Remove chicken from pan, and set aside.
  • Add onion and green pepper to pan and sauté for 3 minutes until onion is slightly softened. Add garlic and sauté for a further minute.
  • Sprinkle over flour, stirring continuously. Gradually add broth/stock, stirring continuously. Return bacon and chicken to the pan, add bay leaves and season with pepper. (I would not recommend adding salt as the bacon already gives this dish a salty flavor). Bring to the boil.
  • Transfer mixture to a 2 quart casserole/baking dish, top with mushrooms and tomato wedges. Cover dish and place in oven for 30 minutes.

To make the dumplings:

  • In a large bowl, mix together flour, suet, and salt, gradually add water until dough is of a soft, elastic consistency.
  • Divide dough into 8 equal pieces, and roll into ball with floured hands.
    Add dumplings to casserole, cover and return to oven for a further 20-25 minutes.


Saturday, October 4, 2008

Rosemary and Garlic Chicken

My apologies, I’ve been a bit remiss with my blogging this week. I got an e-mail from the editor at Oklahoma Living Magazine on Monday asking me to send in a list of article ideas for next year’s editorial calendar, by Friday! And, truth be told, I didn’t have a single idea in my head. Anyway, after a lot of brainstorming, a lot of research, and a couple of sleepless nights, I did manage to put a list together, and got it in by the deadline. (Phew, wipes sweat from fevered brow).

To make matters worse, I’ve been plagued by allergies this week. By Thursday night, they were so bad I was convinced I was coming down with a cold. But enough of my moans and groans, on with the recipe.

This is yet another one from the BBC Good Food Magazine. There are some seriously good recipes in here; the only one I’ve blobbed (failed) with so far was the marmalade chicken. I over-cooked the sauce and it ended up like sticky toffee chicken. I will try it again though, as the bit of sauce that didn’t totally caramelize tasted pretty good, I will just have to take a little more care with it next time.

This recipe, however, was a success. It was so easy to make, and tasted bloody marvelous if I do say so myself. I did make a couple of minor changes to it, and hubby pronounced it a definite keeper.

Rosemary and Garlic Chicken

Note: The recipe recommends cooking the garlic with the skin on, as the slow cooking makes it soft and sweet. Then just pop each clove out of the skin and squish it in the sauce as you eat. Yum!


Ingredients:

6 chicken thighs, bone in, with skin
½ cup flour, seasoned with coarse ground black pepper
1 head of garlic, peeled if you prefer.
2 tablespoons olive oil
3 stalks of rosemary, my rosemary plant has up and died on me so I used dried.
1 cup dry white wine
Black pepper, to taste

Directions:
  • Trim away any excess skin and fat from the chicken, and toss in seasoned flour.
  • Separate the garlic into cloves, I didn’t peel it, but I did trim the ends off each clove.
  • Heat the oil in a large skillet over a medium high heat until searingly hot. Add the chicken skin side down, and fry without moving until skin is brown and crisp. (I reduced heat to medium after 2-3 minutes). When skin is browned and crisp, turn chicken over and brown other side.
  • Add garlic, rosemary, pour in wine, and season with coarse ground black pepper. Bring to the boil, then reduce heat to low, cover pan, and simmer for 40-45 minutes, until chicken is tender and sauce thickened.

I served this with basmati rice, and buttered spinach.


Sunday, September 28, 2008

Pass On the Salt


A couple of posts back I mentioned that I never use salt in cooking, and the only time I ever use it at the table is on chips (French fries), and Emiline http://www.visionsofsugarplum.com/ asked me why? To be honest, it was always just a matter of personal preference, and it wasn’t until I decided to write an article about it that I discovered the American Medical Association is advocating a low salt diet. I wrote this article two years ago, and never succeeded in getting it published, so here it is.


Pass On the Salt

It is not a new health threat. Doctors have been advising us to reduce our salt consumption for years. Yet salt is set to become the latest bad boy on the dietary chopping block. In 2006 the American Medical Association called for drastic reductions in the amount of salt we eat. They agree that excess salt contributes to high blood pressure. This in turn leads to hypertension, and can ultimately result in heart disease, still the number one killer in America today.

How much salt is too much?

According to the National Academy of Sciences, the human body requires a minimum of 500 milligrams of sodium per day to maintain health. The Food and Drug Administration’s (FDA) 2005 Dietary Guidelines for Americans, sets a maximum limit of 2,300 milligrams of sodium per day, (or approximately 1 teaspoon of salt). The levels for adults over fifty, and people with high blood pressure, cardiac disease, or other medical conditions are actually much lower, 1,500 milligrams per day.

Most Americans, however, consume as much as two or three times the maximum recommended dose of sodium every day. The main reason for this is our over-reliance on convenience, restaurant, and fast food. Pre-prepared foods are loaded with salt.

Dr. Rohack, a practicing cardiologist and board member of the American Medical Association explains, "Just one cup of canned soup can contain more than 50 percent of the FDA recommended daily allowance. A serving of lasagna in a restaurant can put a diner over their recommended daily sodium allowance in just one meal. These examples stress the importance of a national reduction in the amount of sodium in processed and restaurant foods."

Why are so many of us addicted to salt?

The human body requires salt or sodium to maintain good health, and since prehistoric times, man has obtained salt naturally from the foods he ate. But, despite being one of the most common minerals on earth, salt wasn’t widely used as a food additive and preservative until the ancient Greeks, Romans, and Chinese learned how to mine it. The high cost of transportation, however, made salt a very valuable commodity, so much so, that Roman soldiers received part of their pay in salt. The English word salary is derived from the Latin, salarium, meaning salt. Salt was such a valuable commodity because of its importance as a food preservative, and preserving food was essential to survival.

Yet, despite modern day refrigeration practices, our love affair with salt continues. The main reason for this is we are usually exposed to salt at an early age and that predilection continues throughout our lives. Even if you eat a diet of fresh meat, fish, fruit, and vegetables, and don’t add salt to your food, you are still exposed to high levels of sodium in: breakfast cereals, bread, cookies, cheese and salty snacks, such as potato chips and nuts.

How can I reduce the amount of salt in my diet?

Until the American Medical Association’s recommendations for a 50% reduction in the amount of sodium in processed and restaurant food are adhered to, the only way to reduce your sodium intake is to retrain your taste buds to prefer less salt.

Expect that it may take several weeks for your palate to adjust, but if you persevere, you will find your tolerance for salty foods diminishes. If you have ever given up taking sugar in your tea and coffee you will understand that it only takes a week or two before sugary drinks become unpalatable.

Healthier alternatives do exist that can add flavor to your food without recourse to salt. Experiment with fresh herbs, spices, and citrus fruits in your recipes.

Doctors agree that following a low-sodium diet is one of the most beneficial things you can do for the health of your heart. So, don’t wait for the American Medical Association’s recommendations to become law. Take control of your eating habits now. Eat a healthy diet of fresh meat, fish, and produce, and avoid convenience and fast food. You owe it to yourself and to your heart.

Tips on reducing your salt intake:

  1. Read the labels on the products you buy to check for high sodium levels. The amount of sodium quoted is per serving, not per box or can.
    As a rough guideline:
    If a product contains 500 milligrams of sodium or more per 100 grams that is a
    lot of salt.
    If a product contains 100 milligrams of sodium or less per 100 grams that is a little salt.
  2. Buy low or no sodium products whenever possible.
  3. Experiment with herbs and spices.
  4. When ordering food in restaurants ask the chef not to add salt to your meal.
  5. When visiting fast food chains ask for information on the nutritional values of their products, or check out their web sites.
  6. If after several weeks, lack of salt still causes culinary consternation, add salt at the table rather than in the cooking process. That way you will still get the salty taste you crave, but the level of sodium will actually be much less. And, always taste your food before you reach for the salt shaker.


Thursday, September 25, 2008

Green Garden Veg Pie

Just a quicky post tonight, as I have a deadline to meet with my latest article for Oklahoma Living Magazine. This is another recipe from the BBC Good Food magazine, (God bless Auntie Beeb, and all who sail in her), and it’s a definite keeper. As usual, I made a few changes to it. The original recipe included cauliflower, which I didn’t have, so I substituted mushrooms. It also required that all the vegetables be partially cooked before being baked, other than the potatoes, I didn’t think that would be necessary, and it wasn’t. You could serve this as a vegetarian main course, or as I did, as a side dish.

Green Garden Veg Pie


Ingredients:

4 tablespoons butter
¼ cup all purpose flour
2 teaspoons ground mustard powder
1 pint milk
¾ cup sharp cheddar, shredded, divided
2-3 large russet potatoes, sliced into thin rounds
1 broccoli crown, cut into florets
6 ounces mushrooms, thickly sliced
1 cup frozen peas, thawed and drained
2 tablespoons fresh chives, chopped
Fresh ground black pepper, to taste

Directions:
  • Pre-heat oven to 420°F
  • Put potatoes in a pan of water, bring to the boil, and simmer for 3-5 minutes, until slightly tender. Drain into a colander and set aside.
  • In a medium saucepan, melt butter over a medium heat. Take pan off heat and gradually stir in flour and mustard powder. Return pan to heat, and gradually add milk, stirring constantly until sauce thickens.
  • Remove pan from heat and stir in ½ a cup of cheese.
  • Reserve the largest of the potato slices to place on top of the dish. Put all remaining veggies in a 3-inch deep, 11x 8-inch baking dish, top with cheese sauce, sprinkle over chives, and a dash of fresh ground black pepper. Top the dish with reserved potato slices, and sprinkle with the remaining ¼ cup of cheese.
  • Bake for 25 minutes until topping is golden and crisp.

Sunday, September 21, 2008

Spaghetti alla Carbonara

Mick made an amazing discovery recently, we can download British TV programs from the internet and watch them on our TV (telly to us Brits). If you want to know more about it, see my post on http://grandlakeink.blogspot.com

This week I have been watching British chef, Gary Rhodes, in a series called "Rhodes Around China," and what a fabulous series it was. Gary Rhodes was just coming to prominence as a TV chef when I left England, and I loved his punk rock spiky hair-do and his cheeky grin. Obviously he’s older now, but aren’t we all? The spiky hair has gone, but he is still one kick-ass chef. I really look forward to watching more British telly, and more British cooking progs in the future.

Last night we had pasta for dinner, Mick always calls this dish, bacon and egg pasta. It’s a popular Italian dish in England, though I don’t recall ever seeing on an Italian menu here. But that doesn’t mean it doesn’t exist, I lead a sheltered life. ;-)

And the good news, after a short lay-off my neighbor, Corky’s hens have begun producing again, so we had free-range eggs for this recipe. We have been buying organic eggs at the store but they are very expensive, so keep up the good work girls.

Spaghetti alla Carbonara


This dish is not terribly photogenic, but believe me it tastes great!

Ingredients:

8 ounces spaghetti
8 slices thick bacon, chopped into 1-inch pieces
1 small onion, chopped
2 cloves garlic, finely chopped
4 eggs
½ cup + 2 tablespoons shredded Parmesan cheese
1 cup heavy cream
2 tablespoons olive oil
2 tablespoons flat leaf parsley, chopped + a little for garnish.
Fresh ground black pepper to taste

Directions:
  • Bring a large saucepan of water to the boil, add spaghetti, and boil gently for 6 -7 minutes until spaghetti is al dente. Drain and toss spaghetti with 1 tablespoon of olive oil. Set aside.
  • While spaghetti cooks, in a large skillet over a medium high heat fry chopped bacon in its own juices until crisp. Remove bacon from pan and drain on paper towels.
  • Discard bacon grease and wipe skillet clean with paper towels.
  • In the same skillet, heat 1 tablespoon of olive oil, add onion and sauté over a medium heat until onion is translucent.
  • Add garlic and sauté for a further minute.
  • Return bacon to pan, add reserved spaghetti, cream, parsley, and season with black pepper, heat gently, stirring often.
  • In a small bowl beat eggs, add to pan and toss all ingredients with a large fork. Cook until eggs begin to set.
  • Add ½ cup of Parmesan cheese, and toss mixture again until cheese is combined.
  • Transfer spaghetti carbonara to a warm serving dish, top with remaining Parmesan cheese and serve immediately.


Wednesday, September 17, 2008

Cottage Pie

Lately, I’ve had a hankering for mashed potatoes and gravy. I’m getting fed up of barbecuing and salads, and I’m ready to start eating some cold weather food. Although our temps have cooled quite a bit, and a few leaves are starting to turn on the trees, the warm weather isn’t quite done with us yet.

On Saturday, however, the remnants of Hurricane Ike moved through our area and gave us a good old soaking. It started raining on Saturday afternoon and didn’t stop bucketing it down until Sunday morning. All that rain and the cool weather allowed me to satisfy my craving for mash with some good old British comfort food, Cottage Pie, lovely.

The difference between Cottage and Shepherd’s Pie is in the choice of meat. Cottage Pie is made with minced beef, and Shepherd’s Pie with minced shepherds, sorry I couldn’t resist, actually ground lamb. I think I’ve mentioned before that lamb is as rare as rocking horse poop here in Oklahoma, hence Cottage Pie.

Another thing, although I have said to use corn starch to thicken the gravy, I actually use a British product called Bisto gravy powder. According to their mantra, Bisto browns, seasons, and thickens all in one go, it’s what my mum always used, so I was weaned on it. But, I should point out that I have made this dish exactly as in this recipe, one time when I couldn’t get hold of any Bisto, and it was still good. If you’re interested you can check out Bisto here:

http://www.britishdelights.com/bisto.htm

Cottage Pie


Ingredients:

1lb ground sirloin
1/2 tablespoon butter
2 lbs. mashed potatoes, mashed with milk and butter
1 onion, chopped.
3 carrots, sliced
2 cups beef stock
1 tablespoon Worcestershire sauce
A generous dash of fresh ground black pepper
2 bay leaves
2 tablespoons cornstarch
2 tablespoons water

Directions:

  • Pre-heat oven to 400°F
  • In a large skillet melt butter over medium high heat and brown meat.
  • Add the onion and sauté for two minutes.
  • Add carrots and beef stock. Bring to the boil, add Worcestershire sauce, black pepper, and bay leaves, and simmer for 20-25 minutes.
  • Using a slotted spoon transfer the mixture to an 11-inch x 7-inch ovenproof dish, reserving most of the stock, and removing bay leaves. Add about ½ of a cup of stock to the meat. I know a lot of people prefer to add most of the stock to the dish, but I find this make the mash to soggy. I like my mash to stay firm, but it’s a matter of personal preference.
  • Cover the mixture with mashed potato, and form grooves in the surface with a fork.
  • Bake for 50 – 60 minutes, or until potatoes are golden brown.
  • Skim any fat from surface of reserved stock. Mix cornstarch with a little water and add to stock. Cook over a medium heat, stirring constantly, until gravy thickens, add more seasoning if required.

Serve pie with seasonal vegetables and lashings of gravy.

Wednesday, September 10, 2008

Blackened Szechuan Chicken

Whoops-a-daisy, I just realized I published the last post without a recipe.


Blackened Szechuan Chicken


Ingredients:

¼ cup soy sauce
¼ cup szechuan stir-fry sauce
Juice of 1 small orange and a couple of teaspoons of zest
2 tablespoons olive oil
4 garlic cloves, chopped
4 tablespoons fresh rosemary leaves
2 chicken breasts with ribs

Directions:


  • Combine first six ingredients in a small bowl. Pour 2/3 of the marinade into a gallon size resealable plastic bag, add chicken and turn to coat. Marinate chicken in refrigerator for a minimum of 4 hours. Cover and refrigerate remaining marinade.

  • Pre-heat BBQ to low.

  • Drain and discard marinade from chicken. Grill chicken, ribs side down, directly on the bars, basting occasionally with reserved marinade. Cook times will vary according to size of chicken breasts, and outside temps, so just grill to desired doneness, and until juices run clear.

The British One Hundred, and an Award

In response to the Omnivores One Hundred, Helen at Food Stories: http://helengraves.co.uk/ has created The British One Hundred. I love lists so I couldn't resist having a go.

Here are the rules if you would like to play along:

1) Copy this list into your blog or journal, including these instructions.

2) Bold all the items you’ve eaten.

3) Cross out any items that you would never consider eating.

4) Link back to Food Stories, if you would be so kind.


1. Grey squirrel. (Having eaten crocodile, wilderbeast, and zebra in Kenya, I think I’d give it a try).

2 Steak and kidney pie

3. Bubble and squeak

4. Spotted dick

5. Hot Cross Buns (A traditional Easter favorite)

6. Laver bread

7. Toad in the hole

8. Shepherds pie AND Cottage pie

9. Scotch egg

10. Parkin

11. Welsh rarebit

12. Jellied eels

13. Stilton

14. Marmite (I hate this stuff)

15. Ploughman’s lunch

16. Cucumber sandwiches

17. Coronation chicken

18. Gloucester old spot.

19. Cornish pasty

20. Samphire

21. Mince Pies

22. Winkles

23. Salad cream

24. Malt loaf

25. Haggis

26. Beans on toast

27. Cornish clotted cream tea

28. Pickled egg

29. Pork scratchings

30. Pork pie

31. Black pudding

32. Patum Peperium or Gentleman’s relish

33. Earl Grey tea

34. Elvers

35. HP Sauce

36. Potted shrimps

37. Stinking bishop

38. Elderflower cordial

39. Pea and ham soup

40. Aberdeen Angus Beef

41.Lemon Posset

42. Guinness

43. Cumberland sausage

44. Native oysters

45. A ‘full English’ breakfast

46. Cockles

47. Faggots

48. Eccles cake

49. Potted Cromer crab

50. Trifle

51. Stargazy pie

52. English mustard

53. Christmas pudding

54. Cullen skink

55. Liver and bacon with onions

56. Wood pigeon

57. Branston pickle

58. Oxtail soup

59. Piccalilli

60. Sorrel

62. Chicken tikka masala

63. Deep fried Mars Bar

64. Fish, chips and mushy peas

65. Pie and mash with liquor

66. Roast beef and Yorkshire pudding

67. Pickled onions

68. Cock-a-leekie soup

69. Rabbit and Hare

70. Bread sauce

71. Cauliflower cheese

72. Crumpets

73. Rice pudding

74. Bread and Butter Pudding

75. Bakewell tart

76. Kendall mint cake (horribly sweet)

77. Summer pudding

78. Lancashire hot pot (I'm from Lancashire, I was weaned on this)

79. Beef Wellington

80. Eton mess

81. Neeps and tatties

82. Pimms

83. Scampi

84. Mint sauce

85. English strawberries and cream

86. Isle of Wight garlic

87. Mutton

88. Deep fried whitebait with tartare sauce

89. Angels on horseback

90. Omelette Arnold Bennett

91. Devilled kidneys

92. Partridge and pheasant

93. Stew and Dumplings

94. Arbroath smokies

95. Oyster loaves

96. Sloe gin

97. Damson jam

98. Soda bread

99. Quince jelly

100. Afternoon tea at the Ritz


I think I would add Bangers and Mash, Kippers, Victoria Sponge, and Jam Roly Poly.

Which ones have you tried, and are there any you would like to add?

Also, Beth at: http://jamandclottedcream.blogspot.com/ has given me this award


Thank you so much, Beth.

I’m a little pressed for time right now so I’ll be passing this on at the weekend.

Saturday, September 6, 2008

Tuna and Pasta Bake

As I said in my last post, mid-week we had a lot of rain and our temps cooled tremendously, so I got the opportunity to make some soup. I had seen this recipe for Tomato and Basil Soup http://cookingdunkinstyle.blogspot.com/2008/09/tomato-basil-soup.html on Cheryl’s blog at: http://cookingdunkinstyle.blogspot.com and wanted to try it.

We still had loads of fresh heirloom tomatoes from our garden and tons of fresh basil so here was the perfect opportunity. I have to say this soup was absolutely delicious. The only changes I made to her original recipe are, I didn’t add any salt, as I don’t use salt in my cooking, I added a green pepper as well as the red, and I very naughtily doubled the amount of cream. This recipe is a definite keeper, and I’m sure I’ll be making plenty more over the fall and winter. Thanks a lot Cheryl.

Now I have a favor to ask of y’all. It’s my birthday mid-month (don’t even ask!), and I’d like hubby to get me a new cookbook for my presi, so I’m looking for some recommendations. I just want something that has great everyday recipes, nothing fancy or gourmet. Can you help me out?

Anyway, enough of that birthday humbug, back to the recipe. On Thursday, as it was still cold, and as I didn’t plan to make my pilgrimage to the store until Friday, I made this old store cupboard stand-by.

Tuna and Pasta Bake


Ingredients:

8 ounces tri-colored rotelle, or rotini pasta
1 jar of Alfredo sauce
1 12-ounce can albacore tuna
6 fresh mushrooms, sliced
1 tablespoon fresh basil, chopped
Fresh ground black pepper, to taste
1½ cups sharp cheddar, shredded, or sufficient to cover the top of your baking dish.

Directions:
  • Pre-heat oven to 350°F
  • Add pasta to a pan of boiling water and boil gently for 5 minutes, drain.
  • While pasta drains, in a medium saucepan, heat Alfredo sauce, tuna, mushrooms, basil, and black pepper over a low heat until sauce bubbles gently.
  • Add pasta and combine.
  • Pour mixture into an 11 x 8½ -inch baking dish, top with cheese, and bake in the oven for 30-35 minutes or until the cheese gets a bit crusty looking.


Wednesday, September 3, 2008

Slow Roasted Pork with Garlic and Onions

Yes, you are in the right place! I’ve had to do a bit of a re-vamp on the old blog, because the margins on the other one were too narrow for the new Foodie Blogroll widget. It was overlapping my recipes, and that will never do.

After bitching on everybody’s blogs that it was too hot here to make soups and chilies, would you believe it’s suddenly got cold? Yesterday, it was 90°F, but it started raining last night, and has chucked it down all day today, the temperature has now plummeted by 25 degrees. But I have a sneaky suspicion that the weather is only teasing me into thinking fall has arrived. I’m sure there will be more hot weather lurking around the corner for me yet, but hopefully low 80’s instead of 90/100’s.

Even though the rain has never stopped the intrepid Brits from barbecuing before, I’m still going to cook something on the stove tonight, just for the sheer novelty value. But more about that later. Today’s recipe is what we had for our Labor day feed.

Slow Roasted Pork with Garlic and Onions


The slow cooking of this meat allowed the onions and garlic to virtually disintegrate into a galze, and to infuse the meat with their lovely flavors, it also kept it really moist.

Ingredients:

I pork joint, I think this one was called a boneless ribeye roast, but I’m not 100% certain.
1 onion, sliced
4 garlic cloves, chopped.
1 tablespoon olive oil
Fresh ground black pepper

Directions:
  • Pre-heat BBQ to low.
  • Place a layer of sliced onions on a sheet of heavy-duty foil and top with pork.
  • Drizzle pork with olive oil, a generous amount of black pepper, top with garlic and another layer of onions. Wrap foil loosely around meat.
  • Roast on grill until the little thermometer thingy pops out, approximately 1hour & 20 minutes. Unwrap foil parcel and cook for a further 20-30 minutes until browned.
I served the pork with roasted rosemary potatoes, I think I’ve posted these before, but they are so good here they are again. We also had a salad, but you can figure that one out yourselves.

Roasted Rosemary Potatoes


Ingredients:

6 red potatoes cut into quarters.
2 sprigs fresh rosemary, leaves only.
1/3 cup dry white wine
3 tablespoons unsalted butter
Fresh ground black pepper
A drizzle of vegetable oil

Directions:
  • Pre-heat BBQ to low.
  • Brush the center of a large sheet of heavy duty foil lightly with oil, add potatoes, pour over wine, sprinkle them with rosemary and black pepper, and dot with butter.
  • Seal package loosely, and grill over a low heat, stirring frequently, for 45 – 60 minutes.

Sunday, August 31, 2008

Balsamic Chicken and Orange Salad

I saw this recipe for Balsamic Chicken and Peach Salad in the chicken recipe booklet that came with the Good Food magazine, and I thought I would give it a whirl.

A few days ago, Mick came home with a big bag of homegrown peaches that one of his co-workers had given him. They were absolutely delicious, and I thought this recipe would be a perfect way to use a couple of them. Wrong! When I checked the bag there was one tiny little peach left in there.

As there are only two of us in this house there are no prizes for guessing who’d scoffed them all, and it wasn’t the cats. Smart as they are, I don’t think they’ve mastered the art of fridge cracking yet, although Alvin can open cupboards and drawers. And even if they had managed to break into the fridge, I don’t think peaches would have been high on their list of priorities.

The peach situation called for a little improvisation. We had plenty of oranges so this recipe became Balsamic Chicken and Orange Salad, and very tasty it was too. Also the recipe said to cook the chicken under the broiler, but we grilled it on the BBQ.

Balsamic Chicken and Orange Salad


Ingredients:

2 tablespoons balsamic vinegar, divided
3 tablespoons olive oil, divided
1 small orange for juice and zest
A handful of fresh basil leaves
1 teaspoon vegetable oil
2 skinless, boneless chicken breasts
2 small oranges, peeled and cut into segments
2 cups spinach

Directions:
  • Pre-heat BBQ to low.
  • Put one tablespoon of balsamic vinegar in each of two small bowls. Add one tablespoon of olive oil to one bowl and two to the other. The first bowl is the marinade and the second bowl is the salad dressing.
  • Grate about a teaspoonful of orange zest into each bowl. Cut orange in half and add the juice from each half to each of the bowls. Add a dash of black pepper to both bowls.
  • Chop about a quarter of the basil leaves and add to the salad dressing only. Cover and store in refrigerator until required.
  • Brush a little vegetable oil on a sheet of heavy duty foil.
  • Dip chicken in marinade until thoroughly coated, and place on foil. Grill for approximately 15 minutes each side until golden brown.
  • Spread spinach leaves over a serving platter, top with orange segments and remaining basil leaves. Slice chicken and scatter it over the top. Drizzle the salad with the reserved dressing and serve.


Tuesday, August 26, 2008

Cheesy Dribblers

I want to say a great big thank you to Beth at, http://jamandclottedcream.blogspot.com for sending me a copy of the BBC’s Good Food magazine, what a fantastic publication this is. I was positively drooling over it last night, and will definitely be making some of those goodies. But not tonight, as I’m too busy reading. There was another little booklet with the mag containing 40 yumptious chicken recipes, and as we eat a lot of chicken at this house it’s given me plenty of ideas. And as a special little bonus, there was also some Cadbury’s drinking chocolate and Bird’s custard powder lurking in the envelope. Yum!

Okay, tonight’s recipe is not rocket science, it’s only burgers, but they were pretty darn tasty, if I do say so myself. I only made 3 burgers as we have one each for dinner and Mick takes one for his lunch, but you could make 4. The addition of the tomato while the burgers grill makes them nice and moist.


Cheesy Dribblers

Ingredients:

1 lb. ground beef
½ cup onion, finely chopped
1 tablespoon Worcestershire sauce. I’m guessing a bit here because I just splash it in until it looks like there’s enough.
2 -3 teaspoons McCormick grill mates, spicy Montreal steak flavor, divided
3 thick slices beefsteak tomato
3 slices Swiss cheese
3 Kaiser rolls

Directions:
  • Pre-heat BBQ grill to high
  • In a large mixing bowl combine beef, onion, Worcestershire sauce, and 1 teaspoon of the grill mates seasoning. Mould into 3 or 4 patties. Sprinkle more of the seasoning mix on each side of the burgers.
  • Grill burgers directly on the bars for 5 minutes. You will need to reduce cooking time if you have 4 patties.
  • Reduce heat to low, turn burgers over and add tomato slices. Grill until tomato cooks, and burgers are of desired doneness. Add cheese slices, toast buns on grill while cheese melts. Serve immediately.


Sunday, August 24, 2008

An Award!

I’ve been given another award, this time from Beth at:http://jamandclottedcream.blogspot.com Thank you so much, Beth, I’m honored.

It’s an Arte y Pico award which originated at this site: http://arteypico.blogspot.com


Here are the rules that accompany this esteemed award:
  1. Choose 5 blogs that you consider deserving of this award for their creativity, design, interesting material and also contribute to the blogging community.
  2. Each award has to have the name of the author and a link to his/her blog.
  3. Each award winner has to show the award and put the name of and link to the blog that presented her/him with the award.
  4. The award winner and the one who has given the prize has to show the link of Arte Y Pico blog so everyone will know the origin of this award.
  5. Show these rules.

Many thanks to everyone who reads this blog, I would like to give this award to all of you, but I can’t, so here are a few of the blogs I like to visit.

Leah, http://acornerofmykitchen.blogspot.com for her interesting posts, great recipes, and lovely presentation.

Dhanggit, http://dhanggitskitchen.blogspot.com for her sweet treats and beautiful photography.

Lori, http://therecipegirl.blogspot.com for her creativeness in the kitchen, and her beautiful presentation.

These two are not cooking blogs, although they both feature recipes from time to time.

Denise, http://anenglishgirlrambles.blogspot.com for the wide variety of topics she covers and her lovely photography.

Plantgirl, http://squarefootgardenblog.com for sharing the ups and downs of square foot gardening.